
January 2023
My interest in natural dyes was roused in my teenage years. I remember begging my parents to send me to Oregon to take a mushroom dying class with Miriam Rice. I missed that opportunity so I experimented on my own. In my parent’s basement I used hemp fabric swatches, aluminum pots, an electric burner and mordants I ordered from Earth Guild in 1998. My results were futile. It was disappointing but I did not give up. So when my assistant Margi saw that Sterling College was offering a mushroom dying class in Vermont, some 25 years later and only 1 hour from my studio, I jumped at the opportunity. It was so worth it.
Last September Margi and I spent a weekend with a lively group of mushroom nerds in Julie Beeler’s class, Mycology & Color: A Chromatic Universe of Mushroom Dyes. After two full days of mushroom science our brains were full, yet we didn’t want the class to end. This incredibly fun class was offered at Sterling College in northeastern Vermont. The location was a perfect setting for mushroom foraging.
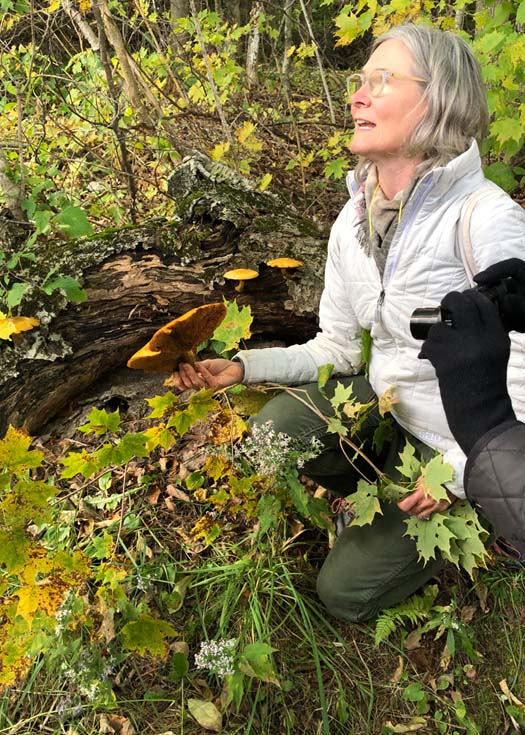
Julie Beeler (pictured above) is a designer, artist and educator whom is passionate about natural dyes and the dying process. You can read more about her work and classes at www.bloomanddye.com.
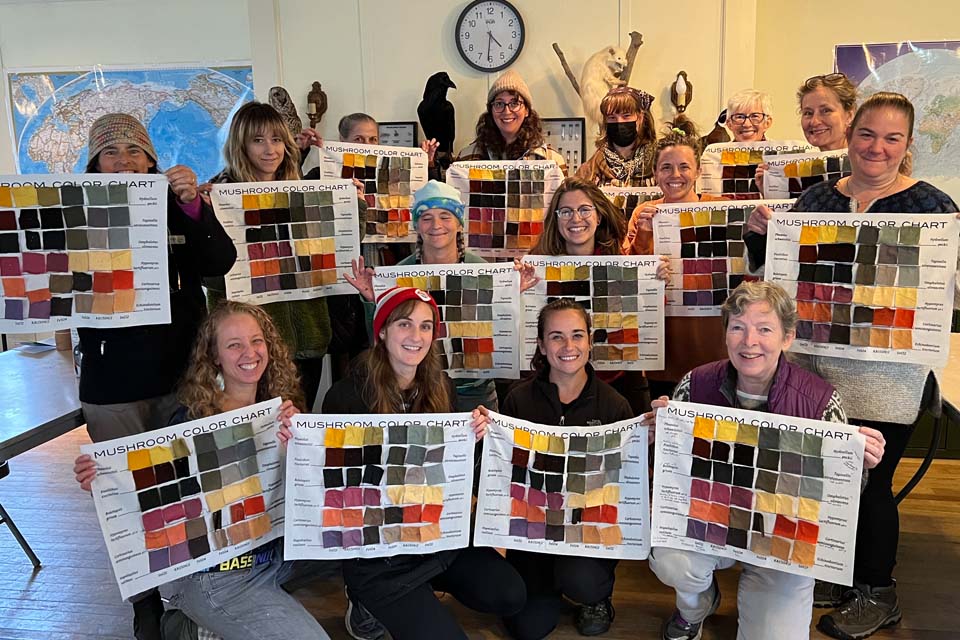
We went home with 36 beautiful and vibrant colored wool swatches that were dyed from only 10 different mushroom species and our own hand dyed shibori silk scarf.
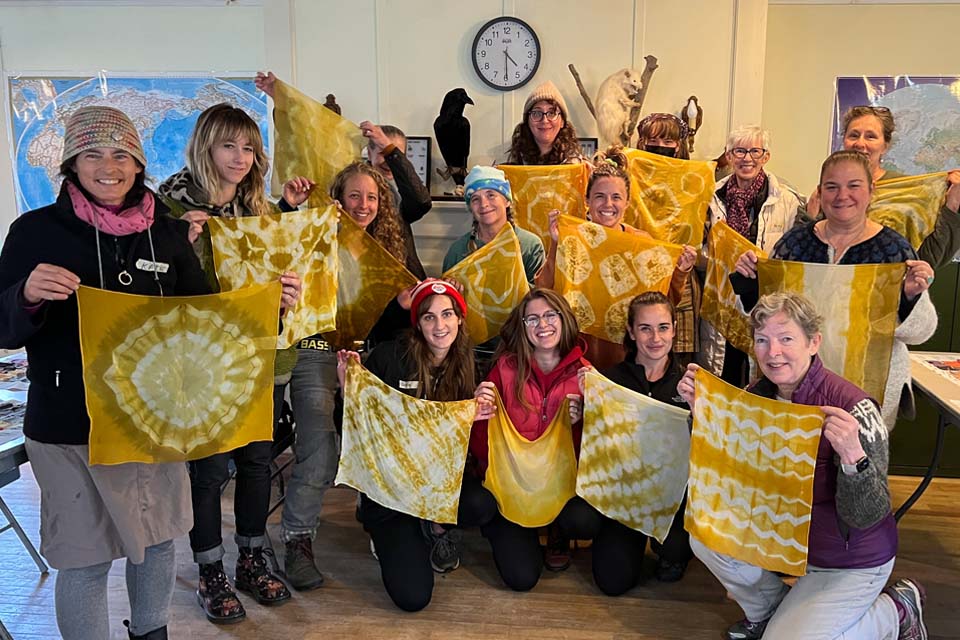
Let’s dive into what we took away from this class. A look back at my notes has helped refresh my memory and fueled my interest to dig a little deeper.
Foraging
Even though many mushrooms are poisonous, you will not die by merely touching them. You must ingest them for them to make you sick or kill you. So it is important to wash your hands and be sure not to stick your fingers in your mouth. Basically don’t eat food or bite your fingernails while foraging.
What you will need:
- A basket and compartmental collection box
- An Opinel mushroom knife has a specially curved blade on one end and a brush on the opposite end. The curved blade allows you to cut through the mushroom stem without pulling up the fungi mycelium.
- I like to bring a magnifying lens
- A mushroom identification book
- A sketch book and a camera
- Tweezers
It is important to be considerate when collecting mushrooms. Only take 10% of what you find out there. If you find just one specimen of one variety, then look to see if the mushroom has released its spores before deciding to pick it. Or come back another day and see if more of that species appear.
Watch your step; I had an incident when I stepped on a stump. Down I went into a pile of small boulders. Un-hurt, I exposed a rare site, a spotted salamander had holed up under the stump. After a few photos, we were able to put the stump back in its place without hurting the salamander.
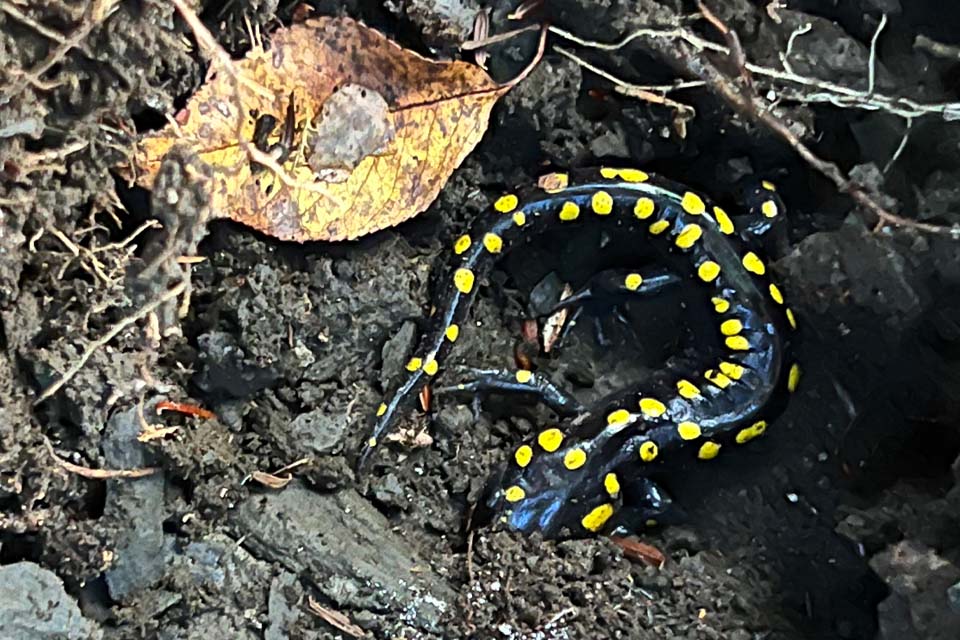
The spotted salamander, 9-24-22 found in the woods near Sterling College, in Craftsbury, Vermont.
Notes on Types of Mushrooms
Bolete Mushrooms are cap and stem fungi with pores on the underside and soft flesh. Julie recommends using old rotten ones and to use the cap. I read, in Mushrooms for Color by Miriam Rice, that the spore tubes are where the color producing chemicals hang out in Boletes. All of the boletes are mycorrhizal, meaning they form mutually beneficial relationships with trees. Boletes often bruise blue when they are damaged. According to Julie’s Mushroom Color Atlas the Boletus rex veris will produce a range of yellow, yellow-orange and beigey green dyes. For a pretty olive green try using a bit of iron.
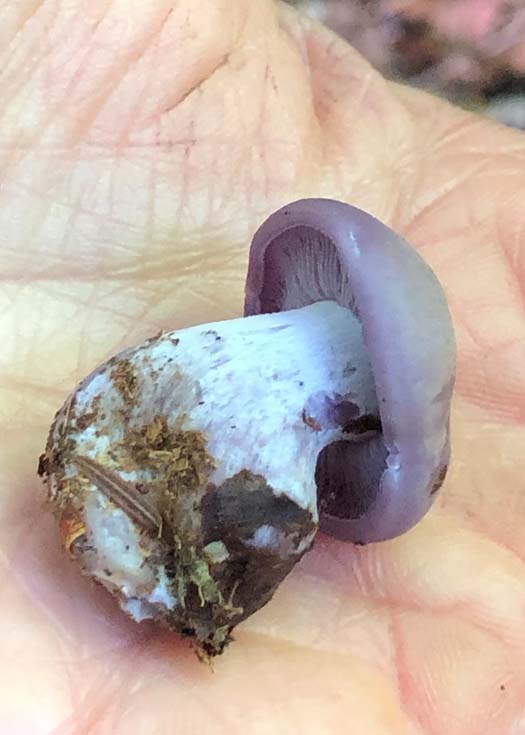
We found a few nice samples of Bolete Mushrooms in the woods near Sterling College.
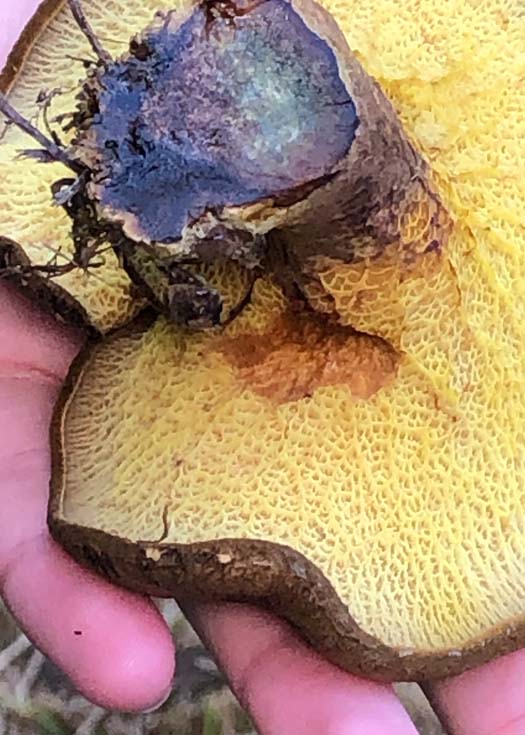
Bolete Mushroom showing blue bruising and pores.
Tooth Fungi or fungi with spines can produce some stunning and saturated blues, greens and greys. For example, the Phellodon niger or Black Tooth fungi produces a deep earthy teal. They perform well with an alkaline bath, as do cellulose fibers, so this dye would be a good match for hemp or cotton. Julie highly recommends maintaining a dye bath at pH 9. For more on pH see the heading below titled Mushroom Dying.
Polypores like Hapalopilus rutilans or Purple-Dye Polypore (the dyers gold) and Phaeolus schweinitzii or Pine Dye Polypore are Bracket or shelf like fruitbodies with pores. Interestingly Julie found the Pine Dye Polypore to be lightfast and color fast without a pre mordant treatment. For more on mordants see the heading below titled Mushroom Dying. Hapalopilus nidulans, we were informed, is widely distributed and common in Vermont, it is a purple dye polypore. It is also an excellent example of the diversity of color to be achieved by one species of mushroom. Mordant your wool in iron to achieve beige, but, with a tin mordant your wool will turn lavender and an alum mordant produces a pretty shade of blush.
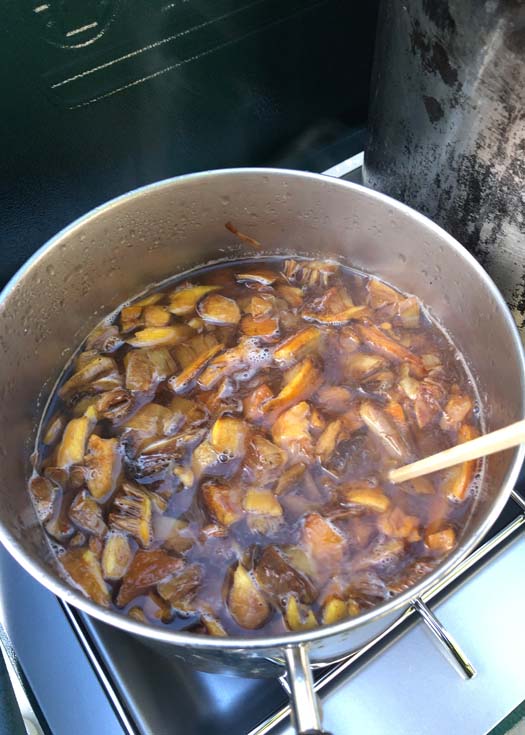
Phaeolus schweinitzii or Pine Dye Polypore in the dye pot.
Coral Fungi in the Ramaria family respond well to iron. Julie found Ramaria to be temperamental to heat and recommend keeping a close eye on your fabric while dying. The species she tested gives warm grey tones and soft butter yellows with similar results on wool, silk and linen. For more on fibers see the heading below titled Mushroom Dying.
Gilled Mushrooms in the Cortinarius family have a cobweb-like veil and rusty brown spore deposits. The Cortinarius sanguineus otherwise called Red-Gilled Web-Cap has blood red gills. The color of a mushrooms gills, spores and flesh often cannot predict the dye color. However, this species foreshadowing does produce a vibrant watermelon color in wool and linen. For shades of marigold try dying with Cortinarius subcroceofolius. Don’t be fooled by the Cortinarius violaceus or Violet Web-Cap. I found this species while hiking Wakely Mountain in the Adirondack Park. This remarkably violet blue mushroom, straight out of Alice In Wonderland, cannot be converted to dye, though it will turn a liquid to a dark purple, its color is due to its high iron content.
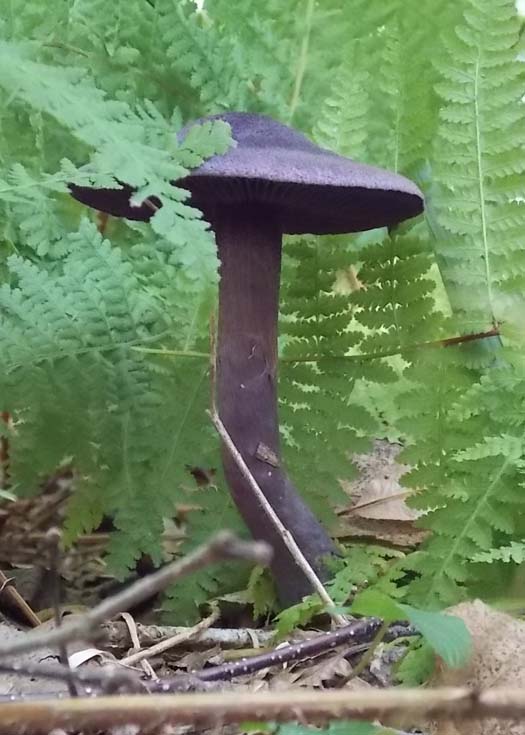
The Cortinarius violaceus or Violet Web-Cap cannot be converted to dye. I found this species while hiking Wakely Mountain in the Adirondack Park.
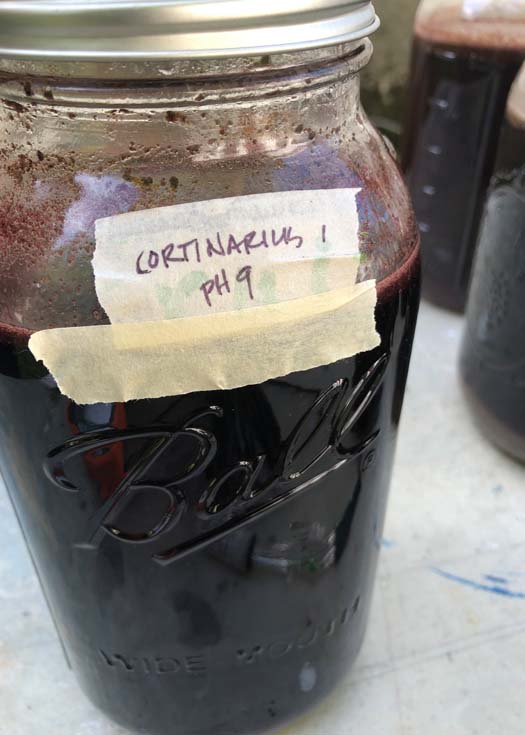
The Cortinarius dermocybe var Web-cap mushroom is found growing among birch forests. Its dye color changes from yellow to red when modifying the alkalinity of the dye bath by adding soda ash adjusting to pH9.
Perhaps by now you can see why Margi and I were so full of information at the end of our two day class that our brains hurt. There was so much to take in; from identifying mushroom species, spelling their scientific names, pronouncing their scientific names, mordants, principles of dying, temperature, fiber, pH balance etc. It’s a lot to learn. However, I encourage you not to get discouraged because your first class, your first experiment, and the first book you read on natural dying is just the beginning, an introduction into the fascinating world of mushrooms.
Identifying Mushroom Specimens
First off get yourself a good book on Mushrooms. Be sure it is specific to the area in which you live or forage and that it has tons of color photos. The best book I own so far is Mushrooms, The visual guide to over 500 species of mushroom from around the world by Thomas Læssøe. This book has a good system for identification starting with the cap and stem. If the specimen has adnate gills see page 25. If the specimen is shaped like a cup see page 27. If the specimen is a bracket with pores go onto page 211. It is a very helpful system and you start to learn how the mushrooms are categorized into families and species.
According to Wikipedia there are over 14,000 mushroom species in the world and the Institute of Microbiology claims over 6 million species of fungi. Every little detail helps with identification. Where a mushroom grows and its mycorrhizal relationship can be a clue to its identification. The shape and underside of the mushroom cap is a good place to start. Does it have gills or pores, what kind of gills, soft or hard flesh? The type of stem, or stipe as mycologists call it, or lack of stipe and what it is growing on are also clues. The color of the mushroom before and after you cut it in half can differentiate species. Its odor and texture and the insects that hang around on it can all help you identify a species.
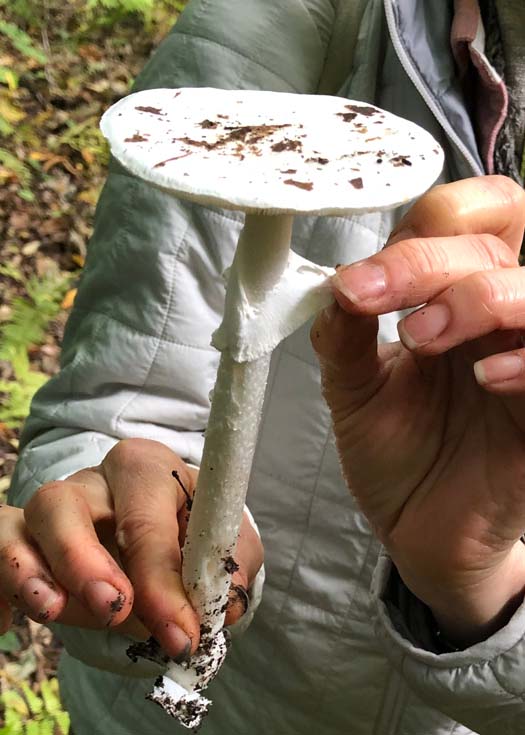 Sometimes you can see a skirt around the stipe, a remnant of the partial veil.
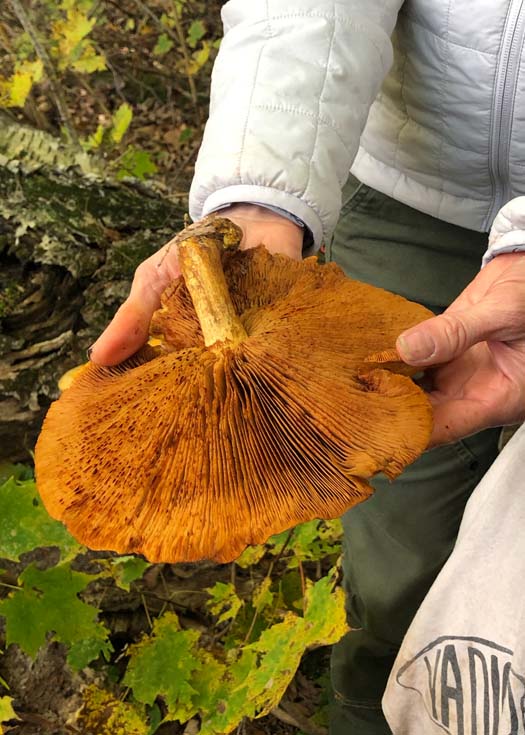 Gilled mushrooms are classified by the type of gills; decurrent, adnate, adnexed, free, notched and sinuate notched gills. Then the proportion of the gills is important to identification; equally spaced, forked, crowded, radiating, widely spaced or perhaps they are joined to a collar.
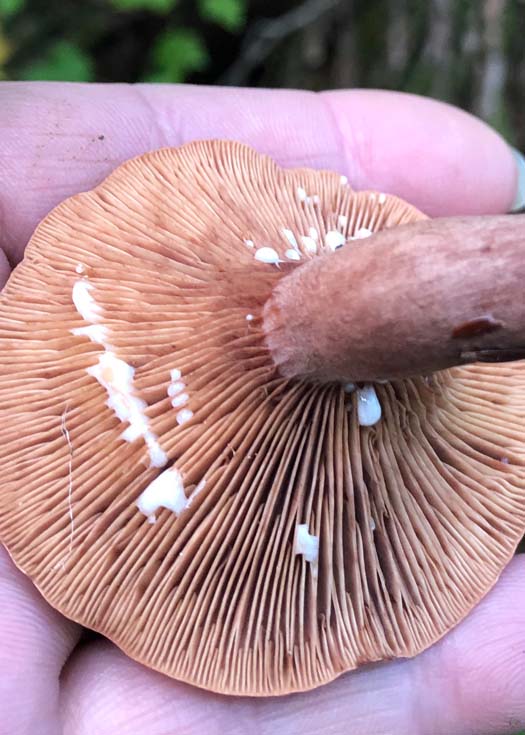 Cap and stem mushrooms with crumbly flesh that exude milk belong to the genus Lactarius in the Russulaceae Family.
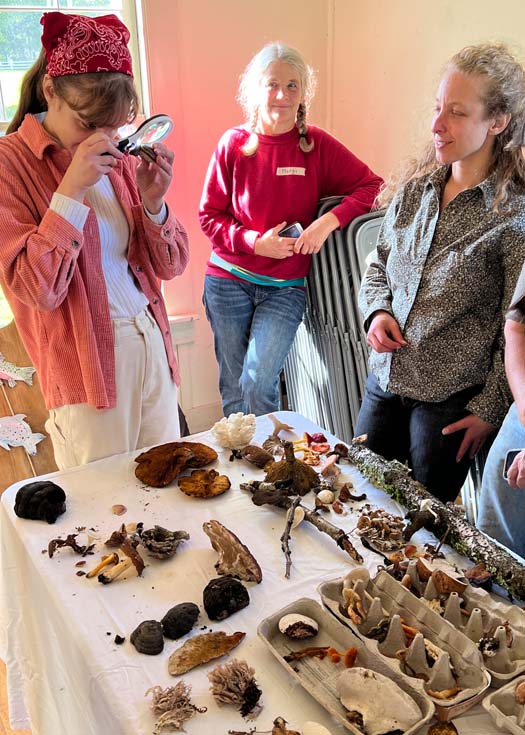 I am often surprised by what I find when looking at mushrooms under a magnifying lens.
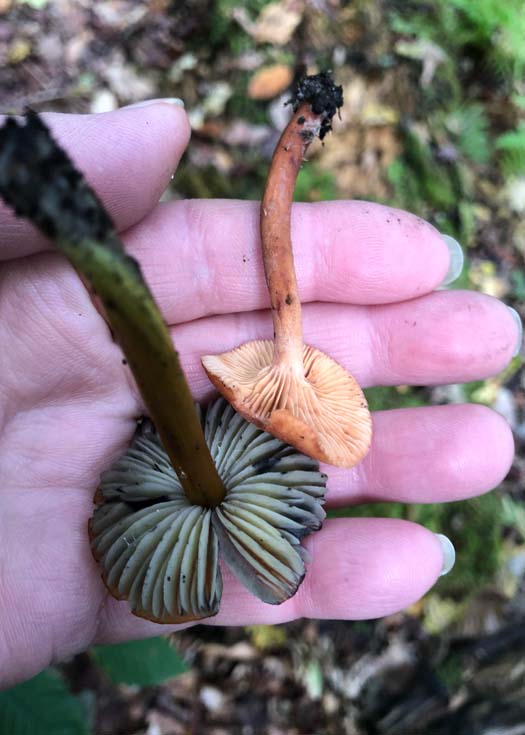 Foraging for mushrooms in Vermont.
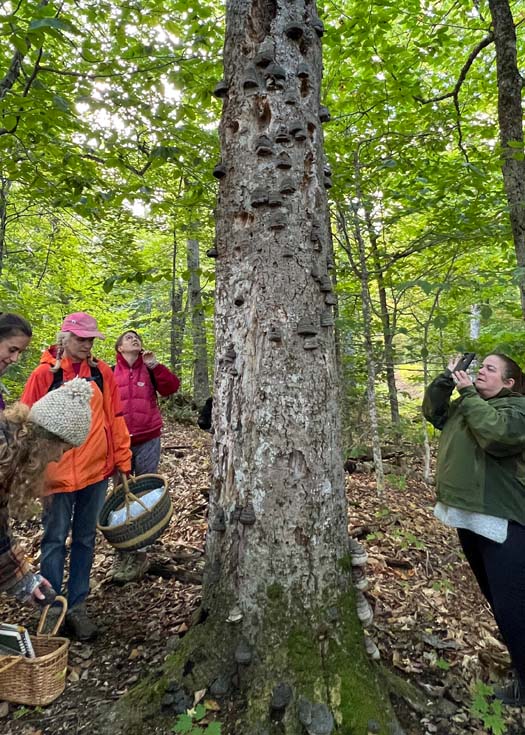 Bracket mushrooms on a tree in Craftsbury, Vermont.
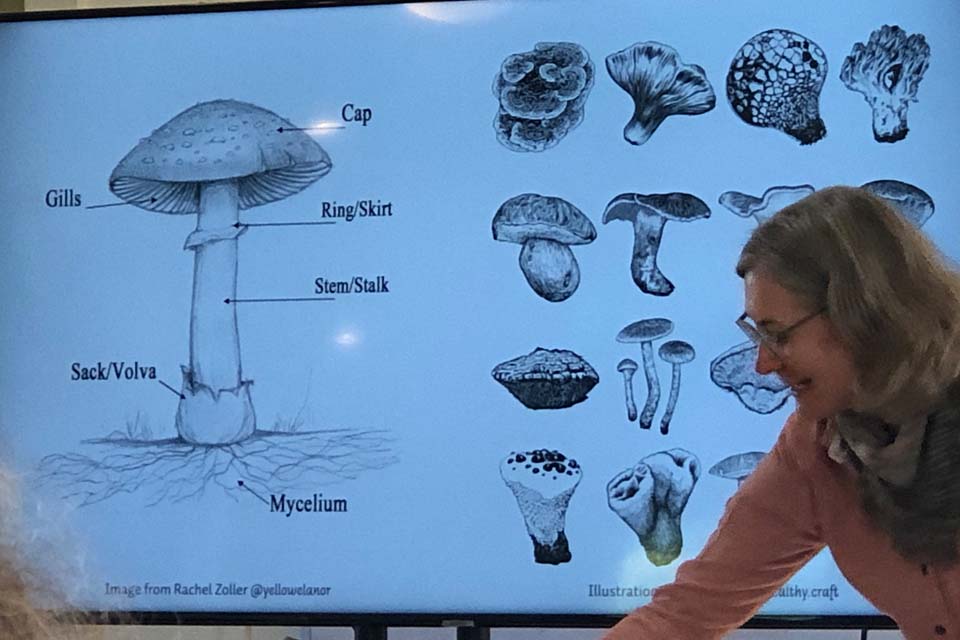
Julie’s Color Atlas was Illustrated by Yuli Gates. Each sketch leads you to her dye results and includes specifications for mordants used, colors achieved, temperature and pH of the dye bath.
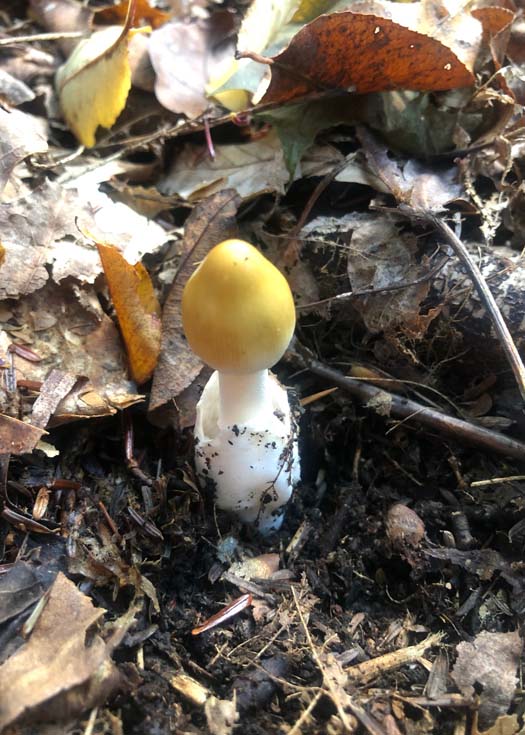
Fruit body and volva.
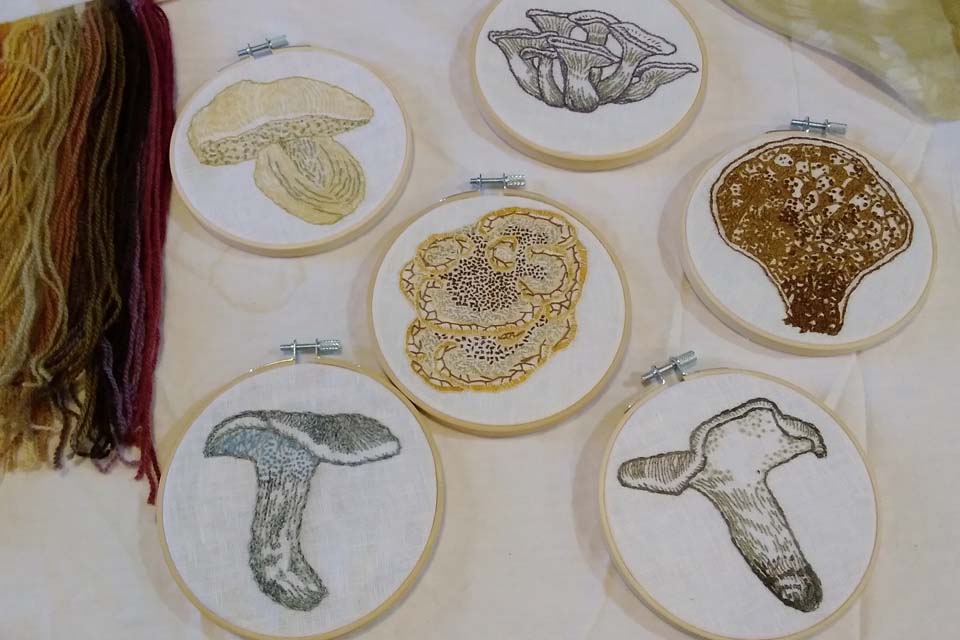 Hand embroidered mushrooms by Julie Beeler. She dyed the embroidery threads using the mushrooms she stitched. I can’t think of a better way to learn your mushrooms.
Preparing for Mushroom Dyeing
The Mushrooms
You can work with fresh, frozen or dried mushrooms. Be sure to dehydrate them properly before you store them for a later date. Cut them up or crumble them up before adding to a dye bath so you get the most surface area to extract the dye.
Typically the weight of the fiber you want to dye should be equal to the weight of the mushrooms. There are exceptions and you will learn as you experiment.
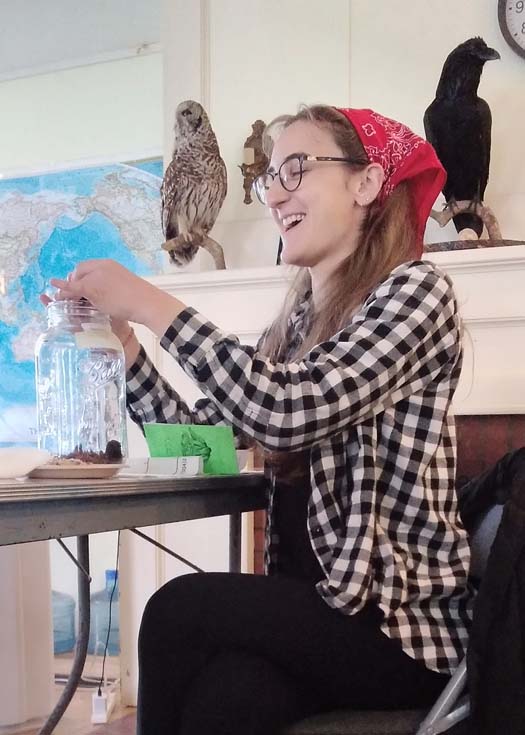
A student is crumbling up a mushroom to prepare it for the dye bath. Julie uses a coffee grinder to increase the surface area of dehydrated mushrooms.
Fibers
Natural dyes saturate protein fibers more easily than they do cellulose fibers. Hemp, linen and cotton are all cellulose fibers. Wool and silk are protein fibers. I use a lot of hemp fabric in my fashion house and thus it will be more challenging to dye hemp with mushrooms. No wonder my first attempt as a teenager was not very successful, all my hemp swatches had the faintest hint of color, barely noticeable. Cellulose fibers are just a bit more laborious, requiring a two step mordanting process; a tannin bath and then mordanting with aluminum acetate. However, Julie says some mushroom dyes won’t bond as well with cellulose/hemp fibers.
Mordants
Intimidating at first, because you can’t just toss mushrooms in a pot of water and add fabric and voila! If you did chances are your fabric will not absorb the color and the color won’t last. It will wash out or fade away. Before you can even dye your fabric you will need to prepare a warm bath with specific minerals to soak your fabric. You will then need to rinse and dry your fabric.
Mordants prepare your fabric to absorb the color and allow the dye to bind with the fibers. It is a chemical reaction that improves saturation and colorfastness. There can be some exceptions, like the Pine Dye Polypore we mentioned above. Common mordants used are minerals like alum, tin and iron. These are the mordants that were used for this class. The mordants you choose can also change the color results significantly. This is how we achieved 36 different colors from only 10 mushroom species. Julie prepared all the wool and silk fabrics in advance. To read more about this process and recommended ratios see the Process page on the Mushroom Color Atlas website.
When we dyed our shibori silk scarves we had the option to dye them marigold before tying them. After thoroughly rinsing the scarf I tied it up so it would resist further absorption. Then I dipped it into an iron bath for a hot minute and like magic the marigold color transformed to olive green.
Dyeing
Now here is where things seemed less complex. Using large mason jars, an old Colman camp stove, some pots from the Salvation Army, a few sticks and stainless steel spoons, a thermometer and a pH meter Julie prepared the dye baths. Keeping in mind that fibers and dyes will react to minerals like iron and aluminum choose your pots and utensils wisely. Also DO NOT use the same cookware to prepare food. Be sure you have a set solely for dyeing.

Julie is checking the pH of each dye bath with a pH meter.
Another way to modify the color results is to change the pH of your dye bath. Simply put use vinegar to create an acidic dye bath. This will help draw the color out of some mushrooms. Or use Soda Ash to create an alkaline dye bath. How do you know which one to use? Well, you can experiment on your own or you can follow the guide lines of some experienced mushroom dyers to get yourself started, Julie Beeler and Miriam Rice to name a few. Below I provided links to other resources mentioned in class. Some I stumbled on while writing this journal entry.
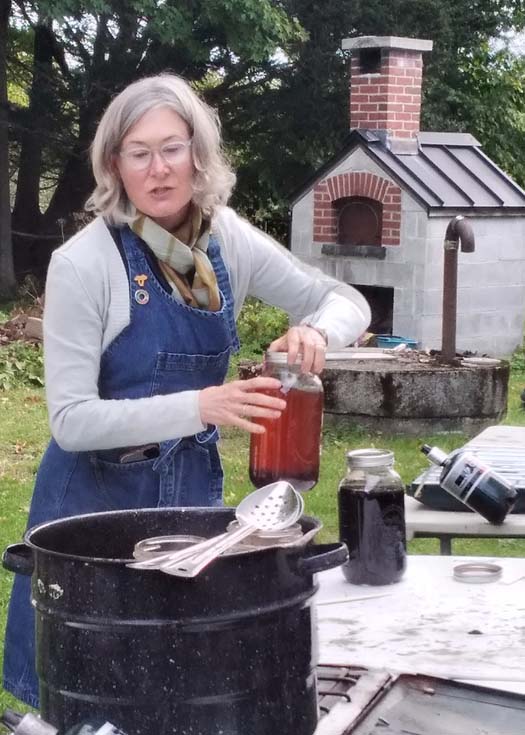
Julie places the mason jars in a large enamel pot.
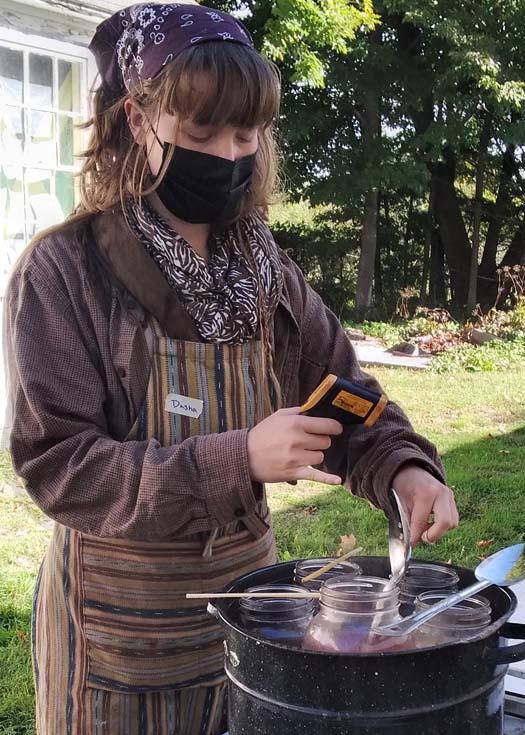
A Sterling College student is checking the temperature of each Mason jar in the pot.
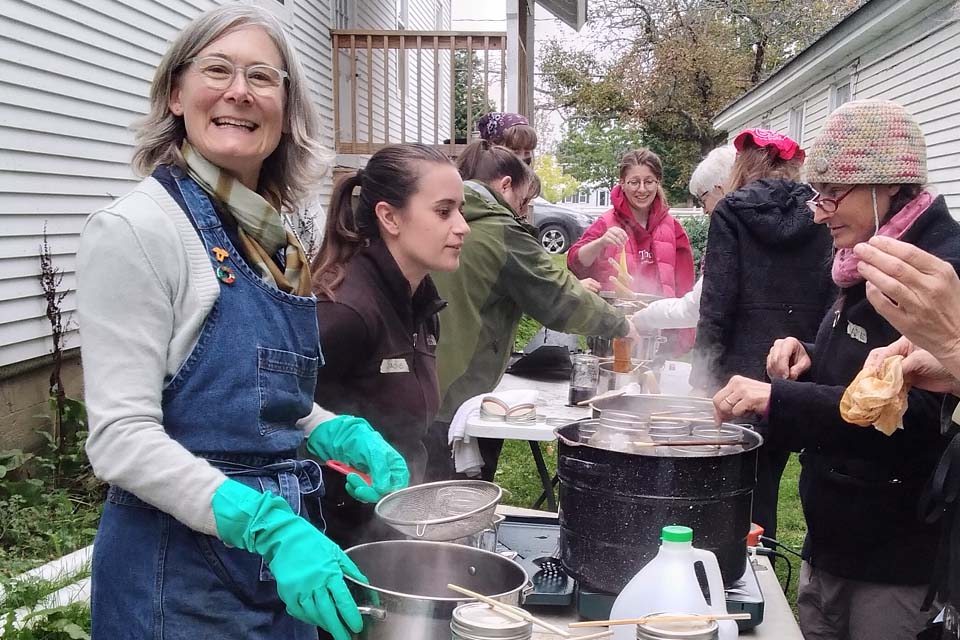
We are dying our handkerchiefs and the pre-mordanted wool swatches.

Drying our mushroom dyed handkerchiefs.
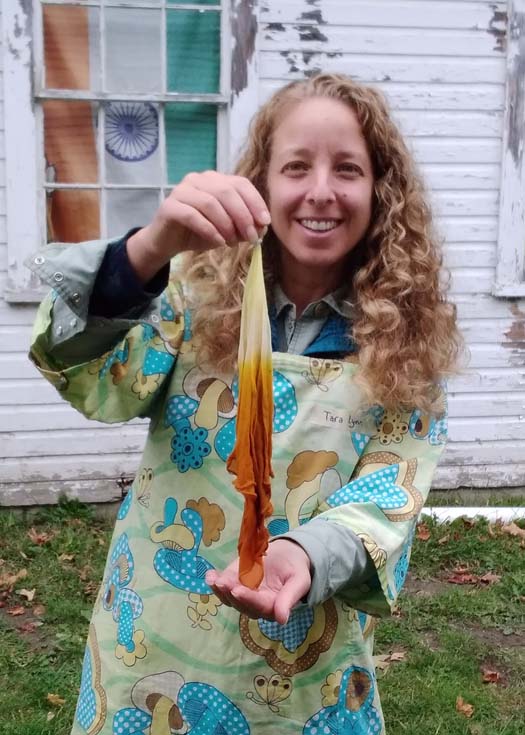
First I dip dyed my pre-mordanted silk handkerchief in Phaeolus schweinitzii, the dyers polypore. I achieved a fade from deep marigold to lemon yellow.
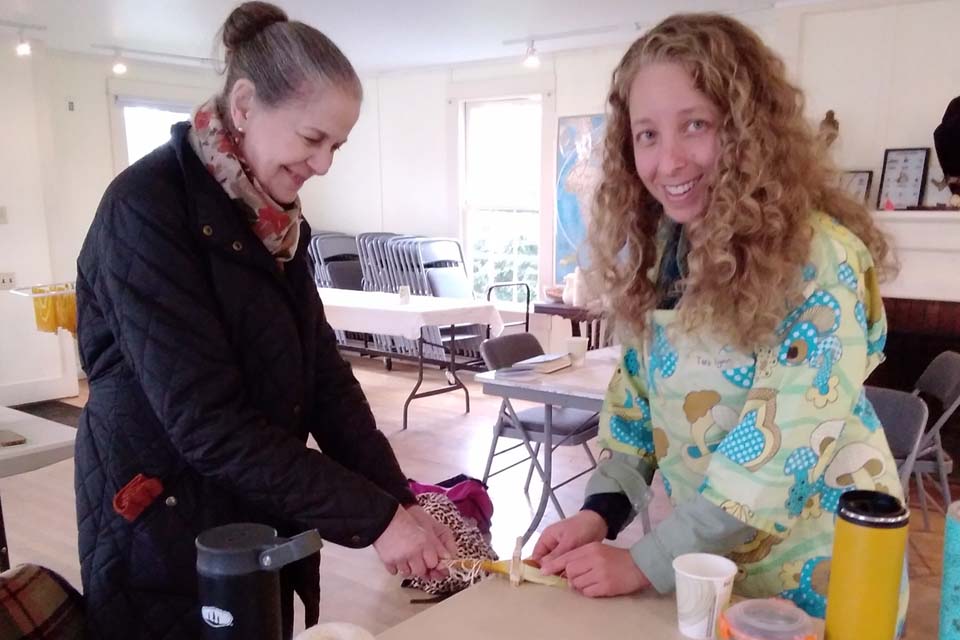
Shibori is an ancient Japanese technique of trying and folding fabrics to create a resist pattern before dying.

This is my handkerchief after it was dip dyed, and thoroughly rinsed and tied up and compressed using string and Popsicle sticks.

This is my handkerchief after it was briefly submerged in an iron bath. The iron transformed the marigold color to shades of olive green.

Another class mates shibori silk mushroom dyed handkerchief.
So Much More to Learn…
Did you know you can make water color paint from a used dye bath? I know right! There was an enthusiastic artist from Cape Cod in our class that does just that. I was able to take home two jars of dye and extracted the pigments for a future project.

Water colors made from mushroom pigments.
I also made a note that I can find success dyeing with one of my favorite flowers, Black Hollyhocks, which are growing in my vegetable garden. The world of natural dyeing is vast and I find it incredibly fascinating. There isn’t enough time in my life to create or do all the projects I imagine.
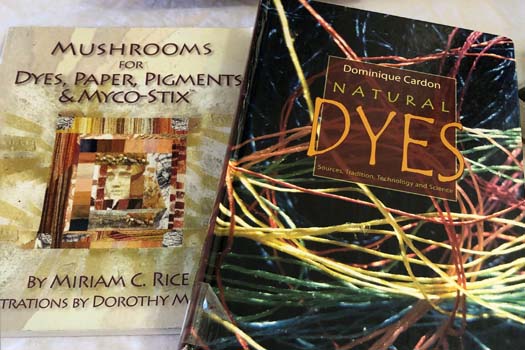
Books on natural dyes.
Digging Deeper
Julie Beeler sites
https://www.juliebeeler.com/
https://www.bloomanddye.com/
https://mushroomcoloratlas.com/
Instagram
Miriam C. Rice
Author of Mushrooms for Color (out of print), and Mushrooms for Dyes, Paper, Pigments & Micro-Stix™
International Mushroom Dye Institute
YouTube Video Documentary
The Rainbow Beneath My Feet: A Mushroom Dyer’s Field Guide by Arleen Rainis Bessette & Alan E. Bessette
Alissa Allen is the founder of Mycopigments. She specializes in teaching about regional mushroom and lichen dye palettes to fiber artists and mushroom enthusiasts all over the world. https://www.facebook.com/groups/mycopigments/
The International Fungi & Fiber Symposium IFFS
Susan Hook is a mycologist that offers workshops and talks about fungi, plants, birds, healthy soil practices and energy medicine.
The Art and Science of Natural Dyes: Principles, Experiments, and Results by Joy Boutrup and Catherine Ellis
Dominique Cardone
Author of Natural Dyes (considered by some the bible of plant dyes)
Jenny Dean
Author of Wild Colour
www.jennydean.co.uk/
The North American Mycological Association (NAMA)
Resources
https://www.stonycreekcolors.com/
https://www.dharmatrading.com/
https://prochemicalanddye.net/
Interesting mushroom related links
https://www.mycoworks.com/ Mushroom Leather
